As an Amazon Associate, I earn from qualifying purchases.
There’s just something about planting bulbs that feels like a promise you’re making to yourself. You tuck them into the dirt, forget about them for a while, and then—just when you need it most—they show up and show out. Over the years, I’ve found a handful of go-to favorites that never disappoint, along with a few planting tips that make all the difference between “meh” and “wow.”
Let’s dig into the ones I keep coming back to season after season.
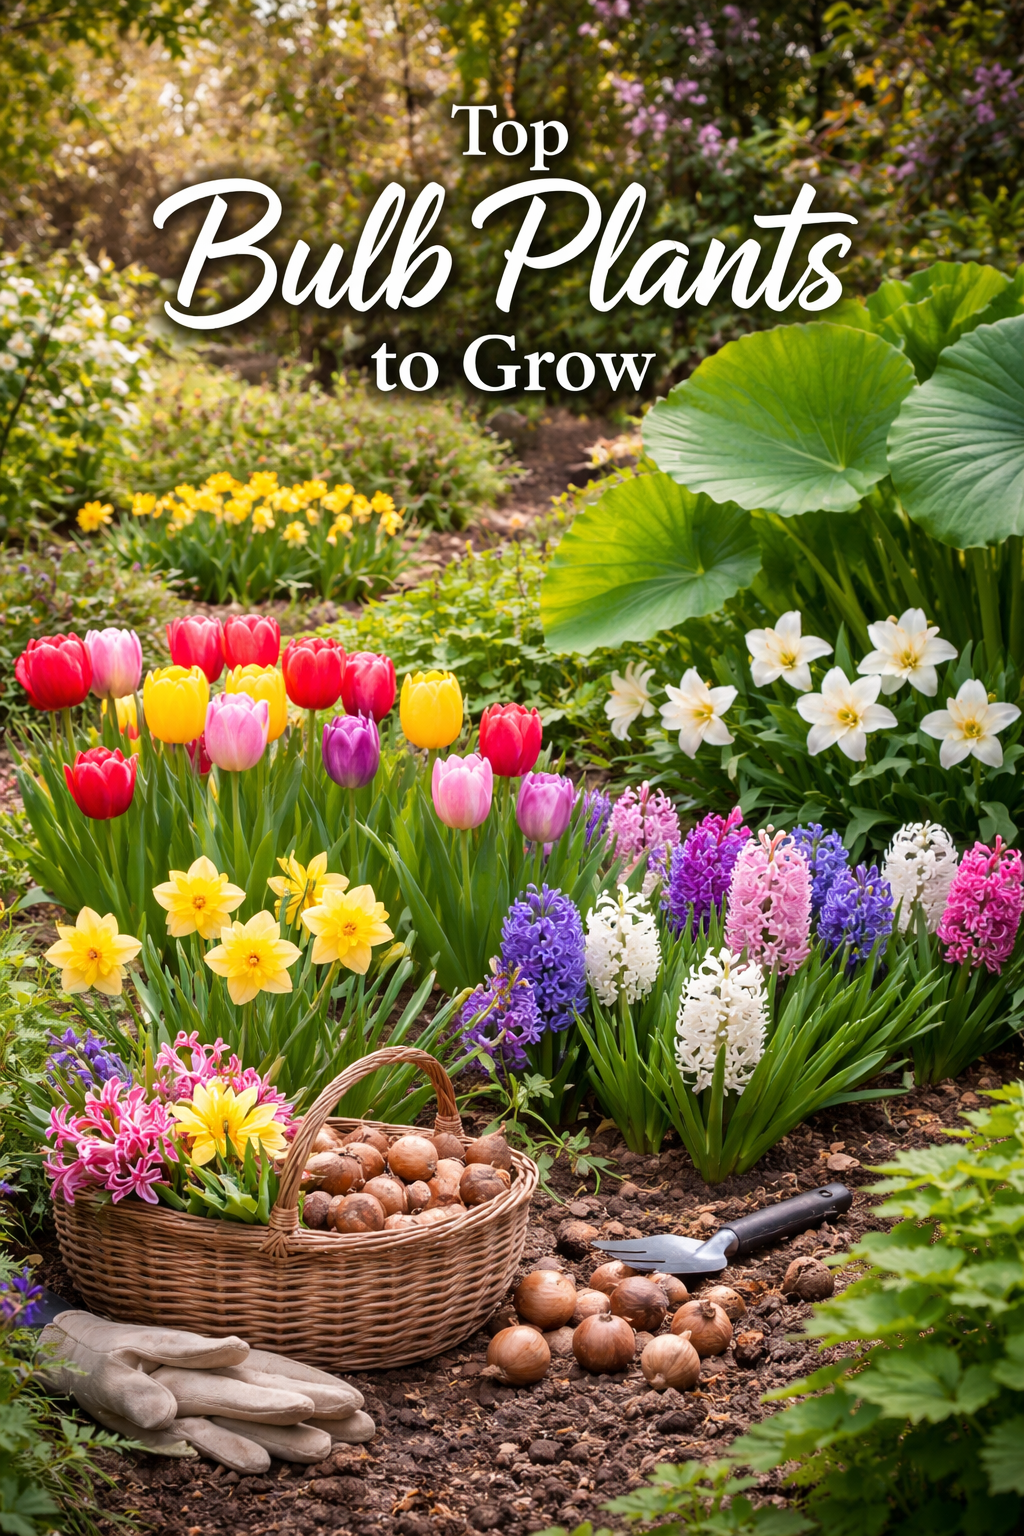
Tulips: Classic for a Reason
Tulips are one of those flowers that never go out of style. They’re clean, colorful, and just downright cheerful. Whether you go for bold reds or soft pastels, they bring that instant “spring is here” feeling to any yard.
That said, tulips can be a little picky depending on where you live. In warmer areas, they don’t always come back strong year after year. Because of that, many gardeners treat them like annuals and replant each fall. It might sound like extra work, but honestly, it’s worth it for that burst of color.
When planting tulips, make sure they go in during the fall before the ground freezes. They need that cold period to bloom properly. Plant them about 6–8 inches deep, and give them well-drained soil so they don’t rot.
Related: DIY Gardening: Tips for Starting Your Spring Garden
Hyacinths: Big Fragrance, Small Package
If you want flowers that make a statement without taking up much space, hyacinths are your best friend. These little clusters pack a serious punch, especially when it comes to scent. You’ll smell them before you even see them.
They’re perfect for lining walkways or planting near a porch where you can actually enjoy that fragrance. Plus, they come in a variety of colors, so you can mix and match without things looking messy.
Hyacinths follow the same general planting rules as tulips. Fall planting is key, and they prefer well-drained soil. One thing to keep in mind, though, is that their scent can be strong—so a few well-placed bulbs go a long way.
Easter Lilies: Elegant and Meaningful
Easter lilies bring a whole different vibe to the garden. They’re tall, elegant, and have that classic trumpet-shaped bloom that instantly catches the eye. While they’re often associated with spring holidays, they can absolutely be grown outdoors with a little care.
If you’ve ever been gifted one in a pot, don’t toss it after it blooms. Instead, plant it outside once the weather warms up. Over time, it can establish itself and come back year after year.
They like a sunny spot with some afternoon shade, especially in hotter climates. Also, make sure the soil drains well because they don’t like sitting in water. With the right conditions, they’ll reward you with those stunning blooms that feel just a little bit special.
Elephant Ears: The Showstoppers
Now let’s talk about my absolute favorites—elephant ears. These aren’t technically bulbs, they’re tubers, but we’re not splitting hairs here. They belong in this conversation because they bring serious drama to any space.
Elephant ears are all about those massive, heart-shaped leaves. They instantly give your yard a tropical feel, even if you’re nowhere near the beach. If you want something that fills space fast and makes people stop and look, this is it.
Unlike the others on this list, elephant ears thrive in warm weather. You’ll want to plant them in spring after the danger of frost has passed. They love moisture, so don’t be shy with watering, and they can handle a bit of shade better than most.
In colder areas, you can dig them up before winter, store them, and replant the next year. It’s a little extra effort, but once you see how big and bold they get, you’ll understand why it’s worth it.
Related: Rooted in Spring: Gigi’s Guide to Starting Your Garden Right
Daffodils: Reliable and Low-Maintenance
If you want something you can plant and almost forget about, daffodils are the way to go. They’re tough, dependable, and tend to come back year after year without much fuss.
Their bright yellow blooms are one of the first signs of spring, and they naturalize well, meaning they’ll spread over time and fill in your space beautifully. That makes them perfect for larger areas where you want a more natural look.
Plant them in the fall just like tulips and hyacinths, about 6 inches deep. They’re not too picky about soil, but they do best in spots that don’t stay soggy.
Simple Planting Tips That Make a Big Difference
Getting the most out of your bulbs doesn’t require a green thumb—just a little know-how. First, always pay attention to timing. Fall-planted bulbs like tulips, hyacinths, and daffodils need that cold period, while warm-weather growers like elephant ears should go in after the last frost.
Next, depth matters more than people think. A good rule of thumb is to plant bulbs about two to three times as deep as their height. This helps protect them and gives them the support they need to grow properly.
Soil is another big one. Most bulbs hate sitting in water, so if your soil is heavy, consider mixing in some sand or compost to improve drainage. On the flip side, elephant ears enjoy a bit more moisture, so they’re a little more forgiving.
Finally, don’t be afraid to group your bulbs together. Planting in clusters instead of straight lines creates a fuller, more natural look. It might feel a little chaotic while you’re planting, but trust me, it pays off once everything blooms.
Bringing It All Together
When you mix these favorites together, you end up with a yard that evolves through the seasons. Tulips and hyacinths kick things off with early color and fragrance, daffodils keep the momentum going, Easter lilies add that touch of elegance, and elephant ears come in strong when the heat rolls around.
It’s not about being perfect or having some picture-perfect garden. It’s about planting things you enjoy and giving them a chance to surprise you. And honestly, there’s nothing better than stepping outside and seeing something you planted months ago finally doing its thing.
Lisa Crow contributed to this article. She is a true crime junkie and lifestyle blogger based in Waco, Texas. Lisa is the Head of Content at Gigi’s Ramblings and Southern Bred True Crime Junkie. She spends her free time traveling when she can and making memories with her large family which consists of six children and sixteen grandchildren.