As an Amazon Associate, I earn from qualifying purchases.
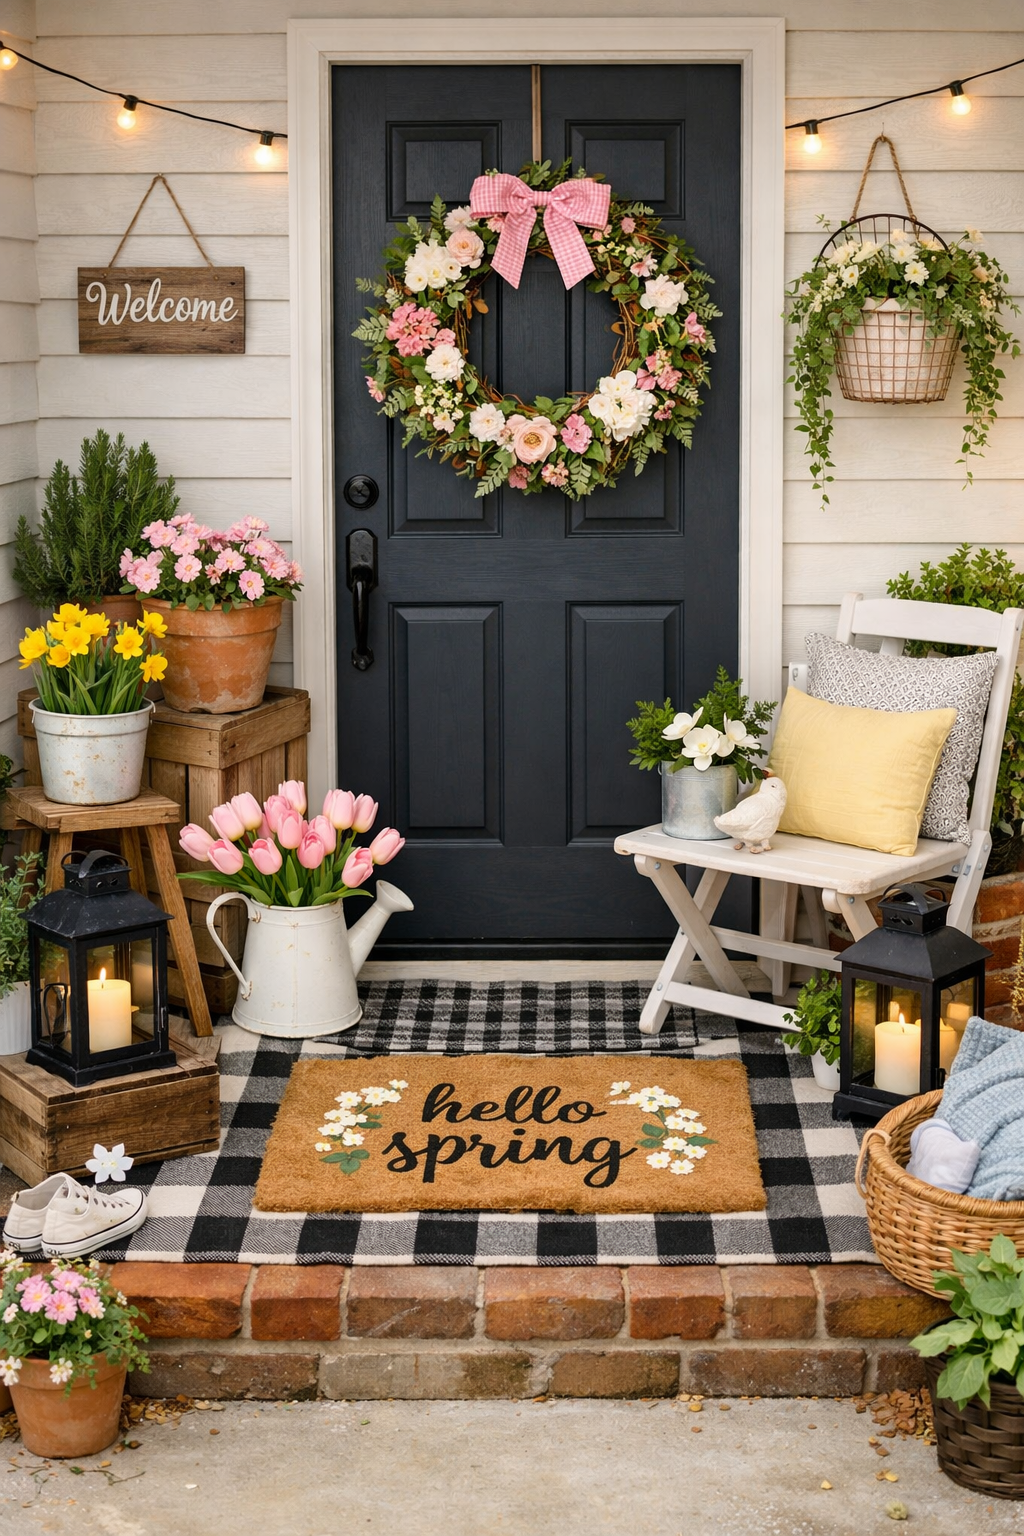
Spring brings longer days, fresh air, and the perfect excuse to refresh your porch. The good news is a beautiful seasonal setup does not require a big spend. With a few smart swaps and simple touches, your entryway can feel bright, welcoming, and ready for spring. These budget-friendly spring porch styling ideas help you create charm without draining your wallet.
Related: Spring Simmer Pot with Lavender & Chamomile for a Fresh Home
Start With a Clean and Fresh Base
Before adding anything new, give your porch a quick refresh. Dirt and winter clutter can make even the prettiest decor feel dull. Sweep the floors, wipe down railings, and shake out rugs. If needed, rinse surfaces with a hose.
Once cleaned, the space instantly feels brighter. A fresh base allows every budget-friendly piece to stand out. Even small updates look more intentional after a simple cleanup.
Add a Budget-Friendly Spring Door Wreath
A wreath is often the focal point of spring porch styling on a budget. It draws attention and sets the tone for the season. Affordable options can be found at discount stores, craft shops, or even thrift stores.
You can also create your own. Start with a grapevine base, then add faux greenery, florals, or ribbon. Soft pastels, greenery, and wildflowers look beautiful for spring. Handmade wreaths often look high-end but cost very little.
Use Potted Plants for Instant Color
Nothing says spring like fresh greenery. Potted plants are one of the easiest ways to decorate a porch on a budget. Mix inexpensive flowers with greenery for a layered look.
Try these affordable ideas:
- Small terra cotta pots grouped together
- Hanging baskets for vertical interest
- Faux plants mixed with real ones
- Herbs for both style and function
Grouping plants in odd numbers creates a fuller appearance. Even budget blooms can look styled and intentional.
Swap Out or Layer Your Doormat
A seasonal doormat adds personality without taking up space. Spring-themed mats with florals, welcome messages, or soft colors work well.
For extra style, layer a smaller doormat over a larger outdoor rug. This trend makes your porch feel cozy and designed. Look for inexpensive outdoor rugs in neutral patterns to keep costs low.
Related: How to Create a Seasonal Spring Mood Board
Add Light and Airy Textiles
Soft textures help transition from winter to spring. Lightweight pillows, cushions, or throws bring comfort and color.
Stick with:
- Pastel tones
- Floral prints
- Soft stripes
- Neutral bases with pops of color
Outdoor pillows can be pricey, so check clearance sections. Pillow covers are another budget-friendly option. Simply swap covers instead of buying new inserts.
Decorate With Thrifted or Repurposed Finds
Budget porch styling works best when creativity leads the way. Thrift stores and yard sales often have hidden gems perfect for spring.
Look for:
- Wooden crates
- Small benches or stools
- Lanterns
- Watering cans
- Baskets
These items add charm and texture. A simple coat of paint can completely transform secondhand finds.
Use Lanterns for Cozy Spring Evenings
Lanterns add warmth and style without much effort. Fill them with faux candles, greenery, or even small florals. Place them near seating or by the door.
Mix different heights for visual interest. Budget lanterns from discount stores still create a polished look.
Keep It Simple and Balanced
Spring porch styling on a budget works best when the space is not overcrowded. Focus on a few key pieces instead of filling every corner.
Try this simple formula:
- One focal point near the door
- A small seating or plant area
- A layered doormat setup
This keeps your porch feeling clean, welcoming, and seasonal.
Refresh With Small Seasonal Touches
Finally, add small details that celebrate spring. These finishing touches complete the look without extra spending.
Consider:
- Faux tulips in a pitcher
- A pastel watering can
- A small welcome sign
- Decorative bird accents
These little additions bring personality while staying budget-friendly.
Spring porch styling on a budget is all about creativity and thoughtful choices. With a few affordable pieces, your porch can feel fresh, inviting, and ready for the season. Even small updates create a space that welcomes guests and makes coming home feel extra special.
Lisa Crow contributed to this article. She is a true crime junkie and lifestyle blogger based in Waco, Texas. Lisa is the Head of Content at Gigi’s Ramblings and Southern Bred True Crime Junkie. She spends her free time traveling when she can and making memories with her large family which consists of six children and sixteen grandchildren.